The installation of engineered hardwood flooring can be done three ways: glued to the subfloor, floated on top of it or nailed and stapled to a wood subfloor. Which method is right depends on the product, the subfloor and the room, and getting it right decides whether the floor stays flat, quiet and tight for decades. Engineered hardwood has become a common choice across Northern Virginia, in new homes in Ashburn and Leesburg, in townhomes in Manassas and Woodbridge, and in condos in Tysons and Arlington, because it handles the region's humidity swings and works over concrete slabs where solid hardwood generally does not. This guide explains what engineered hardwood is, how each installation method works, what the subfloor needs, how acclimation and moisture testing fit in, what the process looks like on site and what to ask before you hire anyone. At Floors and Beyond VA, we install engineered and solid hardwood, and we also refinish and restore existing floors.
WHAT ENGINEERED HARDWOOD IS
Engineered hardwood is built in layers. The top layer is real wood, called the wear layer or veneer, and it is what you see and walk on. Beneath it is a core made of plywood, high-density fiberboard or a similar material, often with several cross-laminated layers that give the plank stability. Because the layers run in different directions, the plank expands and contracts less than a solid board when humidity changes. That stability is the main reason it is popular in Northern Virginia, where summers are humid and winters are dry.
The thickness of the wear layer varies widely. Thin veneers are only a fraction of a millimeter and cannot be sanded. Thicker wear layers, a few millimeters or more, can be sanded and refinished one or more times. If you want the option of refinishing someday, ask about the wear layer before you buy. Our guide to engineered hardwood floor refinishing explains how this works, and our NoVA Guide entry on whether engineered hardwood can be refinished gives a short answer.
THE THREE INSTALLATION METHODS
Glue down. The planks are bonded directly to the subfloor with an adhesive specified by the manufacturer. This method gives a solid feel underfoot and a quiet floor, and it works on both concrete and wood subfloors. It requires a clean, flat, dry subfloor and careful troweling, because the adhesive and the trowel size both matter. It is often the preferred method over concrete slabs and in large open areas.
Floating. The planks are joined to each other, either with click-lock edges or with glue in the tongue and groove, and the floor rests on an underlayment above the subfloor without being attached to it. It is faster, can be installed over many surfaces and does not require adhesive on the subfloor. A floating floor must have room to expand and contract along the edges, and it relies on the underlayment for sound and comfort. It is common in condos and over radiant heat when the manufacturer approves.
Nail or staple down. The planks are fastened through the tongue into a wood subfloor with a nailer or stapler. This is the traditional method for solid hardwood and is used for engineered planks thick enough to take fasteners. It gives a secure, solid floor, but it requires a wood subfloor of the right type and thickness and cannot be used over concrete.
Some products allow more than one method, and some allow only one. The manufacturer's installation instructions decide, and following them is essential for the warranty.
HOW TO CHOOSE THE METHOD
Start with the subfloor. Over concrete, the choices are glue down or floating. Over plywood or plank subfloors, all three methods may be possible. Consider the room. Large open areas often do well with glue down, while condos with sound rules often use floating with a rated underlayment. Consider the product. Thin planks may not be suitable for nailing. Consider the schedule. Floating installations can be faster. Consider future changes. A floating floor is easier to remove than a glued one. And consider heating. Radiant systems restrict some methods and products.
A specialist can usually settle the choice in a single visit. Our guides on glue down LVP and floating LVP explain the same trade-offs for vinyl, and many of the ideas carry over.
THE SUBFLOOR COMES FIRST
For all methods, the subfloor must be clean, dry, flat and sound. Manufacturers specify how much variation they allow, often a small fraction of an inch over several feet, and an installer checks the floor with a straightedge. Low spots are filled, high spots are ground or sanded and loose boards are fastened. On wood subfloors, squeaks are addressed before the new floor goes down. On concrete, dust and old adhesive are removed, cracks are repaired and moisture is tested.
MOISTURE TESTING AND SLABS
Concrete holds and releases moisture, and engineered hardwood responds to it. Many Northern Virginia homes have slabs in basements, on lower levels of townhomes and in condo units. Manufacturers set limits and require testing for many products, using methods such as calcium chloride tests or relative humidity probes. If the slab is too moist, the answer may be a moisture mitigation system before installation. Skipping this test is one of the most common causes of failure, and the damage may not appear for weeks or months. Our guide to moisture barriers for LVP flooring explains the same concerns in detail.
ACCLIMATION
Wood responds to its environment, and engineered hardwood needs time to adjust to the conditions of the room before installation. The manufacturer specifies how long and under what conditions, including the temperature and humidity range of the space. Boxes are typically stored in the room, off the floor and away from exterior walls and vents. The home should be at normal living conditions, with heating and cooling running. Rushing this step can lead to gaps or cupping later. Our overview of how long flooring needs to acclimate explains the idea.
RADIANT HEAT
Engineered hardwood is often the choice for homes with radiant heating because its layered construction is more stable than solid wood. Still, not every product is approved, and the method of installation and the system's temperature limits matter. The heat must be brought up and down gradually, and the manufacturer's instructions on maximum surface temperature must be followed. Always confirm approval before ordering.
THE INSTALLATION PROCESS
While details vary, an engineered hardwood installation generally follows these steps.
Preparation. Furniture and old flooring are removed, baseboards are taken off or protected and the subfloor is inspected, cleaned and repaired. Moisture testing is done where required.
Layout. The installer plans the direction of the planks, usually along the longest wall or toward the main light source, and marks starting lines. The pattern is planned so the last row is not a thin sliver, and the stagger of ends is set so that seams do not line up.
Underlayment or adhesive. For floating floors, underlayment is rolled out. For glue down, adhesive is troweled in sections. For nail down, a moisture-retarding paper may be laid.
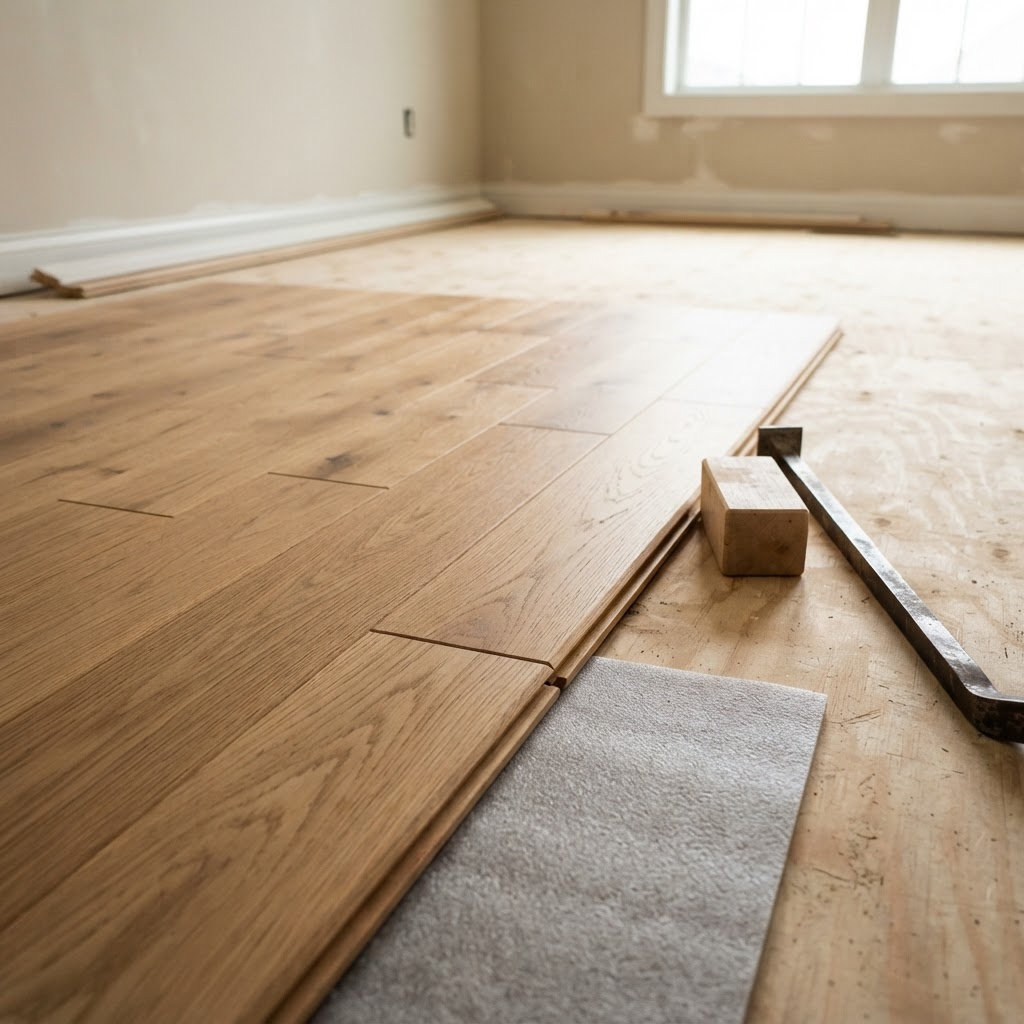
Installation. Planks are placed, joined and fastened according to the method. Gaps are left at walls for expansion. Cuts are made around doorways, vents and corners.
Finishing details. Transitions, reducers, thresholds and trim are installed. Baseboards or quarter round are reinstalled to cover the expansion gap. Stair parts and nosings are fitted where needed.
Cleanup and walkthrough. The floor is cleaned, protected as needed and inspected, and the installer explains care.
TALK TO A SPECIALIST BEFORE YOU ORDER
Engineered hardwood comes in many species, widths, wear layers and finishes, and the best installation method depends on your subfloor and room. A short visit can answer most questions. Floors and Beyond VA offers in-home estimates in Ashburn, Leesburg, Reston and throughout Northern Virginia. Schedule an in-home estimate at floorsandbeyondva.com/Contact or call (703) 906-5698, and we will check the subfloor, bring samples and put the scope in writing.
STAIRS AND TRANSITIONS
Stairs are a detailed part of any hardwood installation. Treads and risers are measured, cut and fitted individually, and stair nosings are installed with the adhesive or fasteners the manufacturer specifies. Matching stair parts should be ordered with the flooring, since they may be hard to find later. Transitions between rooms and between engineered hardwood and other floors should be planned so they are safe and look finished. Ask your installer how they will handle changes in height.
ASHBURN, LOUDOUN COUNTY AND NEWER HOMES
Ashburn and the rest of Loudoun County have many newer homes with open main levels, basements on concrete and wood-framed upper floors. Engineered hardwood is common in these homes for its stability and its look. Large open layouts mean long, uninterrupted runs, and the installation method must suit them. Basements call for moisture testing and often glue down or floating installation. Builder-grade subfloors in new construction can still have seams, fasteners and variations that need attention. A new home is not a guarantee of a flawless subfloor.
CONDOS AND SOUND
In condos and townhomes, association rules often govern flooring. Sound ratings, approval requirements and work hours may apply, and some buildings specify the underlayment. Floating or glue down installation with a rated underlayment is common. Ask your installer to help with the documents the association needs. Our guides to flooring installation in Tysons Corner and LVP flooring in Arlington condos explain the process in more detail.
WIDTH, SPECIES AND FINISH
Engineered hardwood comes in many species, including oak, hickory, maple and walnut, in a range of widths and finishes. Wider planks are popular for a modern look but are more sensitive to humidity swings and subfloor flatness. Factory finishes are durable and consistent, and site-finished options exist for some products. Matte and satin sheens hide scratches and dust better than high gloss. Look at full-size samples in your own light, and ask how the finish can be maintained and repaired.
NEW FLOORS VERSUS RESTORING AN OLD ONE
If your home already has hardwood, consider whether it can be restored before you replace it. Solid or thick-veneer floors that are structurally sound can often be refinished at a fraction of the disruption of a new installation. Our guide on whether refinishing hardwood floors is worth it explains the decision. If the old floor cannot be saved, or you want a different look or material, new engineered hardwood is a strong option.
COMMON MISTAKES TO AVOID
Skipping moisture testing on a slab. Installing over an uneven subfloor. Ignoring acclimation requirements. Using the wrong adhesive or trowel. Forgetting expansion gaps on floating or glue down floors. Mixing planks from different production runs without checking color. Placing heavy furniture too soon. Choosing a very wide plank without considering the humidity and the subfloor. Failing to check approval for radiant heat. Each of these can cause problems that are hard to fix, and each is preventable.
CARE AFTER INSTALLATION
Engineered hardwood is cared for much like solid hardwood. Use mats at entrances, felt pads under furniture and a cleaner made for hardwood. Avoid excess water, steam mops and abrasive tools. Keep humidity in a moderate range. Protect floors from strong direct sunlight, which can fade some finishes and woods. If the wear layer is thick enough, a screen and recoat can renew the finish before it wears through. Keep leftover planks for future repairs.
HOW FLOORS AND BEYOND VA APPROACHES INSTALLATION
Floors and Beyond VA starts with the subfloor and the manufacturer's instructions. We check flatness, test moisture where concrete is involved, confirm the product is approved for the method and the room and plan the layout before the first plank goes down. We explain our recommendations, put the scope in writing and prepare documents for condo associations when needed. Our crews are our own employees, which means the people who evaluate your space are the people who install your floor. If your existing floor can be restored instead, we tell you so.
A CHECKLIST BEFORE YOU BUY
Confirm the wear layer thickness and whether the floor can be refinished. Confirm the approved installation methods and whether they suit your subfloor. Confirm the moisture limits and the testing required on concrete. Confirm approval for radiant heat if you have it. Ask about acclimation requirements and where the boxes can be stored. Ask whether matching stair parts and transitions are available. Look at full-size samples in your light. Ask about the warranty and what it requires, such as moisture testing documentation. With these answers in hand, you can compare products and installers on the same terms.
HOW LONG DOES AN ENGINEERED HARDWOOD INSTALLATION TAKE?
A single room can be installed in a day, while a full main level may take several days, depending on the method, the preparation and the layout. Glue down floors need time for the adhesive to cure before heavy furniture returns, and floating floors can often be used sooner. Stairs add time because every tread and riser is fitted individually. Delivery and acclimation add days or weeks before installation begins. Ask your installer for a schedule that includes each stage, and plan for the furniture, pets and daily routine of your household during the work.
WHAT IF SOMETHING UNEXPECTED SHOWS UP?
Surprises happen when old flooring comes up. The subfloor may be damaged, uneven or damp. There may be old adhesive that needs special handling, or squeaks that need fasteners. A good installer stops, shows you the problem, explains the options and agrees on any change to the scope in writing before continuing. That openness is one of the clearest signs of a company you can trust, and it is far better than hearing about a problem for the first time on the final invoice.
THE BOTTOM LINE ON INSTALLATION
A well-chosen engineered hardwood floor, installed by the method the manufacturer approves over a properly prepared subfloor, can last for decades and look beautiful throughout. The product matters, but the preparation and the installer matter more. Start with an honest evaluation of your subfloor and room, and the rest of the decisions become much easier.
FREQUENTLY ASKED QUESTIONS
Can engineered hardwood go over concrete? Yes, with proper moisture testing and the right method, usually glue down or floating.
Can it be installed over radiant heat? Some products are approved, with limits on temperature and method. Check the manufacturer's instructions.
Do I need underlayment? For floating installations, yes. For glue down, usually not. The manufacturer decides.
Can I refinish engineered hardwood? If the wear layer is thick enough, sometimes. Thin veneers cannot be sanded.
How long does installation take? It depends on the size, the method and the preparation. Your installer can give a schedule after seeing the space.
Is engineered hardwood waterproof? No. It resists humidity better than solid wood but should not be exposed to standing water.
How long should I wait before using the floor? Light use is often possible soon after installation, but glue down floors need cure time before heavy furniture. Follow your installer's instructions.
READY TO PLAN YOUR FLOOR?
If you are planning an engineered hardwood installation in Ashburn or anywhere in Northern Virginia, the quickest way to a clear plan is to have the space evaluated. Floors and Beyond VA is a family-owned flooring company serving Northern Virginia since 1987. Schedule an in-home estimate at floorsandbeyondva.com/Contact or call (703) 906-5698.