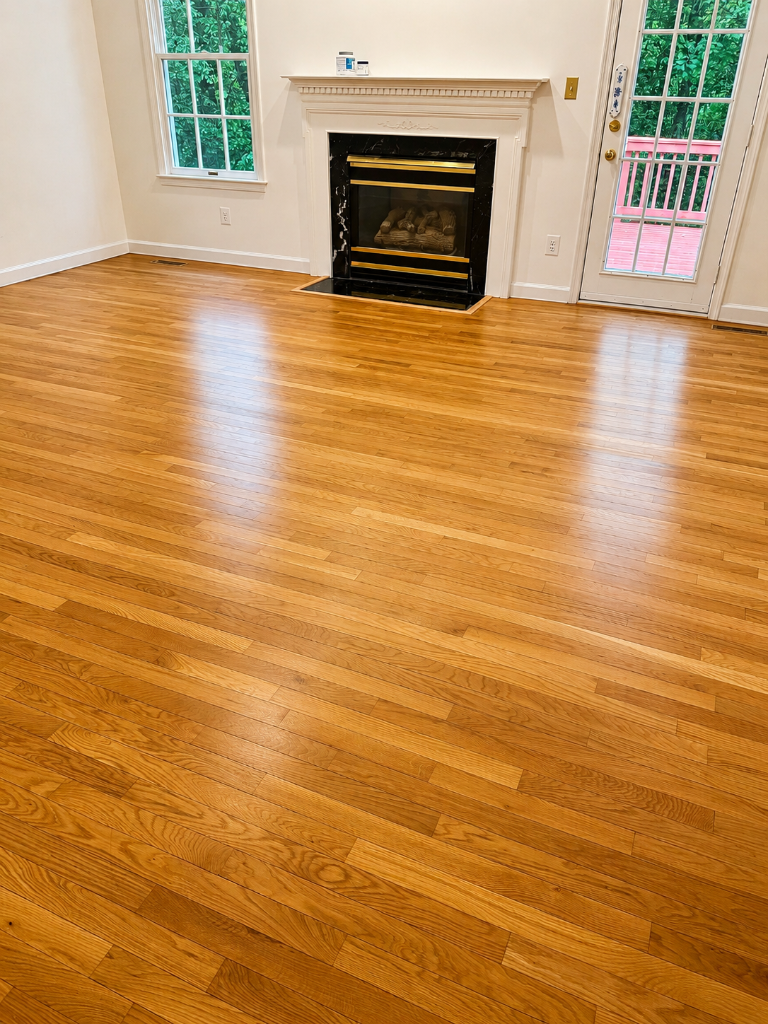
Most McLean homeowners who decide to refinish their hardwood floors already know why. The finish is worn through in the hallway, the color looks tired, the floors have scratches from a decade of dogs and furniture. What they want to know is what will actually happen in their house. How much dust? How long will they be out of the kitchen? Can they stain it a different color? What does a crew do on day one, day three, day five? When can the furniture come back? This guide answers those questions in order. It follows a typical refinishing project from preparation through cure, with notes on the choices you will be asked to make along the way: stain or natural, water-based or oil-based finish, sheen, and how to schedule the work around your family. It applies to the colonials, split-levels, Cape Cods and larger custom homes common in McLean, Great Falls, Dunn Loring and the surrounding areas. If you are still deciding whether to refinish or replace, our guide on refinishing hardwood floors in McLean homes covers that decision. At Floors and Beyond VA, we refinish floors with our own crews, and this is how we run a project.
BEFORE THE CREW ARRIVES
The work begins before the first sander turns on. At the estimate visit, we look at the wood species, the thickness left above the tongue and groove, the condition of the finish and any damage such as pet stains or gaps. We test a small area for wax or polish, because wax prevents new finish from bonding. We talk with you about color, sheen, timing and what else is happening in the house, such as painting or other trades. You receive a written scope that describes the rooms, the steps and the finish system. You will also decide which rooms to include. Refinishing a single room can leave visible lines between rooms, so open floor plans are usually done as one continuous area.
PREPARING THE HOUSE
A day or two before work starts, the house is prepared. Furniture is moved out of the work area. Rugs come up. Anything on the walls near the floor, such as artwork, is removed or protected. Vents and return grilles are covered, and doorways to areas not being worked on are sealed with plastic. Modern sanding equipment uses dust containment, with vacuum attachments that capture most of the dust at the machine. It is much cleaner than the sanders of past decades, but it does not eliminate dust completely, so covering and sealing still matter. Pets and small children should be somewhere else during sanding, and so should anyone with respiratory sensitivities.
DAY ONE: REPAIRS AND FIRST SANDING
The crew starts by walking the floor and marking loose boards, protruding nails and damaged areas. Nails are set below the surface, loose boards are fastened and gaps or holes are filled where appropriate. Squeaks can be addressed at this stage, which is the best moment because repairs blend into the sanded surface. Our guide on creaky hardwood floor repair explains the methods.
Then the first sanding begins. A large drum or belt sander removes the old finish and levels the floor, working with the grain of the boards. Edges and corners are sanded with an edger, and tight spots with hand scrapers or detail sanders. The first pass uses a coarse grit to cut through the old finish. The crew vacuums the floor between passes. In older McLean homes with several layers of varnish or uneven boards, the first pass can take longer.
DAY TWO: FINE SANDING AND PREPARATION FOR COLOR
The second and third passes use progressively finer grits. This is where the floor goes from rough to smooth. The goal is a uniform surface with no swirl marks or scratches, because stain and finish will reveal any flaws left behind. The floor is vacuumed thoroughly, and often tack-cleaned with a damp cloth, since dust left on the surface becomes part of the finish. If you are staining, the crew may do a sample on a small area, often a closet floor or hidden corner, so you can see the color on your wood before committing to the whole room. Different woods take stain differently, and the same stain can look different on red oak and white oak. Seeing it on your own floor is the only reliable way to choose.
DAY THREE: STAIN, IF YOU ARE USING IT
Not every floor is stained. Many homeowners choose a natural look and let the wood color show through the finish. Others stain to deepen the tone, match another floor or change the color completely. Stain is applied evenly and wiped, and it needs time to dry before finish goes on. The drying time depends on the product and the humidity. Water-based stains dry faster, and oil-based stains give richer color but take longer. Once stain is applied, the floor should not be walked on until it is dry enough for the finish coat.
DAYS THREE TO FIVE: FINISH COATS
The finish is the protective layer, and it is applied in coats. A typical project uses two or three coats of polyurethane, with light abrading between coats so each bonds to the last. Between coats the floor must dry, which takes hours for water-based products and longer for oil-based ones. Humidity and temperature affect drying. McLean summers can be humid, and drying slows when the air is damp, so crews adjust the schedule. During this stage the house should be kept as clean and quiet as possible. Nothing should be dragged across the floor, and doors to the work area should stay closed.
WATER-BASED VS OIL-BASED FINISH
Water-based finish dries clear and stays clear, keeping light woods light. It dries quickly, has lower odor and is easy to recoat. Oil-based finish adds a warm amber tone that deepens as it ages, takes longer to dry and has a stronger odor. Both are durable when applied properly. Water-based finish suits modern and light-toned interiors, while oil-based finish suits traditional homes and those who like a richer glow. Hardwax oils are another option, giving a natural low-sheen look and easy spot repair, though upkeep differs. Ask to see samples on your wood.
CHOOSING A SHEEN
Sheen is how glossy the finish looks. Gloss reflects the most light and shows every scratch and imperfection. Semi-gloss is less reflective and still shows wear. Satin is the most popular choice because it hides small marks and looks natural. Matte and extra-matte give a very low sheen and look modern, though they show scuffs from some types of wear. The choice is personal, but remember that the sheen is part of how your floor ages. Satin tends to look good for longest in a busy house.
TALK TO US BEFORE YOU PICK A DATE
The right schedule depends on your house and your plans. Floors and Beyond VA offers in-home estimates in McLean, Great Falls, Tysons, Vienna and throughout Northern Virginia. Schedule an in-home estimate at [floorsandbeyondva.com/Contact](/contact) or call (703) 906-5698, and we will test your floor, show you stain and finish samples on your wood, and explain what the timeline would look like for your home.
HOW LONG UNTIL I CAN WALK ON IT?
Drying and cure are two different things. The floor dries enough to walk on in socks within about twenty-four hours after the last coat for many water-based finishes, and a day or more for oil-based ones. Furniture can usually return after several days, with felt pads on every leg. Rugs should wait longer, usually a few weeks, because a finish that is still curing can trap moisture and stick to the rug backing. Full cure often takes about thirty days, and during that time the floor is hard enough for normal living but still gaining strength. Your contractor should give written instructions that follow the manufacturer's recommendations.
LIVING IN THE HOUSE DURING THE PROJECT
Many McLean families stay in the house during refinishing, with the work area sealed. It is easier if you can use a part of the house that is not being worked on, with a kitchen workaround if the kitchen floor is part of the project. Finish odors are noticeable, and water-based products have less. Pets and children should be kept away from the work area until the floor is dry. Some families choose to stay elsewhere for a few nights, especially for oil-based finish or when sensitive family members are present. Planning ahead makes the project less stressful.
OLDER HOMES, WIDE BOARDS AND OTHER MCLEAN SPECIFICS
McLean has a mix of older homes with original oak or pine and newer homes with wide-plank or engineered floors. Older floors may have been refinished before and may have less wood left to sand, which affects the plan. Face-nailed boards need nail heads set carefully. Wide boards move more with humidity and may show gaps in winter. Engineered floors depend on the wear layer, which decides whether sanding is possible. Our guide to engineered hardwood floor refinishing explains how to tell. In every case, the test patch and the thickness check tell us what the floor can take.
AFTER THE PROJECT
When the work is done, the crew walks the floor with you, points out any areas to watch and explains care. Basic care includes felt pads, mats at doors, a hardwood cleaner and avoiding water and steam. Keep humidity moderate through the year. Do not drag furniture. Schedule a maintenance recoat when the finish begins to dull but before it wears through. A recoat takes a fraction of the time of a full refinish and keeps the wood protected. Our guide on how often hardwood floors need refinishing helps you plan.
COMMON QUESTIONS ABOUT DUST
Dust is the worry that comes up most often. Modern dust-containment sanders capture most of it, and sealing vents and doors keeps the rest from spreading. Fine dust can still settle on surfaces in the work area and nearby rooms, and a light cleaning afterward is normal. The best protection is preparation: seal doors, cover vents, remove items from shelves and keep the plastic in place until the project is finished.
HOW FLOORS AND BEYOND VA RUNS A REFINISHING PROJECT
Floors and Beyond VA treats the process as a sequence with checkpoints. We test before we sand, sample before we stain and tell you the drying and cure times before the last coat goes on. Our crews are our own employees, they protect your home and they leave written care instructions. If your floor cannot be refinished well, we tell you before we start.
QUESTIONS TO ASK ANY REFINISHING CONTRACTOR
Do you use dust-containment sanders? Which finish do you use and why? Will you test for wax and do a sample on my wood before staining? How many coats will be applied, and what is the drying time between them? Who does the work, your own employees or subcontractors? What is your plan for protecting the rest of the house? What will you do if you find damage under the old finish? What written care instructions do you provide? Do you offer a maintenance recoat? Clear answers show a contractor who has done this many times. Vague answers suggest improvisation.
WHAT CAN GO WRONG AND HOW TO AVOID IT
Refinishing problems are usually preventable. Peeling or fisheyes in the finish often come from wax or contaminants left on the wood. Visible swirl marks come from skipping grits or rushing the sanding. Sticky or tacky finish comes from high humidity, recoating too soon or an incompatible product. Bubbles come from applying finish too fast or in the wrong conditions. Gaps that open after refinishing usually reflect seasonal wood movement, not a flaw in the work. A contractor who tests, samples, controls the environment and respects drying times avoids most of these, and one who explains the risks beforehand is easier to trust.
TIMING YOUR PROJECT AROUND THE SEASONS
In McLean, humid summers slow finish drying and dry winters pull moisture from the wood. Spring and fall are the most comfortable seasons for refinishing, with moderate humidity and the option to open windows. Summer projects work fine with air conditioning running, and winter projects work with the heat on and a humidifier if the air is very dry. Whichever season you choose, keep the house at normal living conditions for the drying period. If you are planning other work, such as painting or cabinet installation, do it before the floors, so the new finish is not damaged by other trades.
STAIRS, LANDINGS AND THE REST OF THE HOUSE
Many McLean homes have hardwood stairs, and the question comes up whether to refinish them with the floors. Stair treads take heavy wear, and refinishing them at the same time keeps the color and sheen consistent from the foyer to the second floor. Stairs are usually done last, because the crew needs a clear route, and they need extra drying time before anyone uses them. If you must use the stairs during the project, plan for a route that avoids wet finish, and ask whether treads can be done in alternating sections. Landings, hallways and closets are worth including so there are no visible breaks between old and new finish.
PROTECTING YOUR NEW FINISH IN THE FIRST WEEKS
The first few weeks after refinishing matter. Keep pets' nails trimmed. Do not drag furniture or appliances. Use felt pads and wide casters on chairs. Place mats at doors but avoid rubber-backed rugs that can discolor a curing finish. Clean only with a dry mop or a lightly damp cloth until the finish has fully cured. If something spills, wipe it up right away. These habits give the finish time to reach full hardness and make the work last longer.
Every floor is different, and the schedule we write down is specific to yours, including drying times, furniture return and the care steps for the first month.
FREQUENTLY ASKED QUESTIONS
How long does refinishing take? A typical room or small main level takes several days including drying. Larger homes take longer.
Can I stay in the house? Often yes, with the work area sealed. Plan around odors and keep pets and children away.
How much dust will there be? Much less than in the past with dust-containment equipment, but some is normal.
Can I change the color? Yes. Stain can darken or change the tone, and a sample on your wood shows the result.
When can I put furniture back? After several days, with felt pads. Rugs wait longer.
Do I need to refinish the whole floor? In open layouts, yes, so there are no visible lines. Separate rooms can be done separately.
Can all floors be refinished? Most solid hardwood can. Engineered floors depend on the wear layer.
READY TO START?
If you are ready to refinish your McLean floors, the first step is an in-home look at the wood. Floors and Beyond VA is a family-owned flooring company serving Northern Virginia since 1987. Schedule an in-home estimate at [floorsandbeyondva.com/Contact](/contact) or call (703) 906-5698.