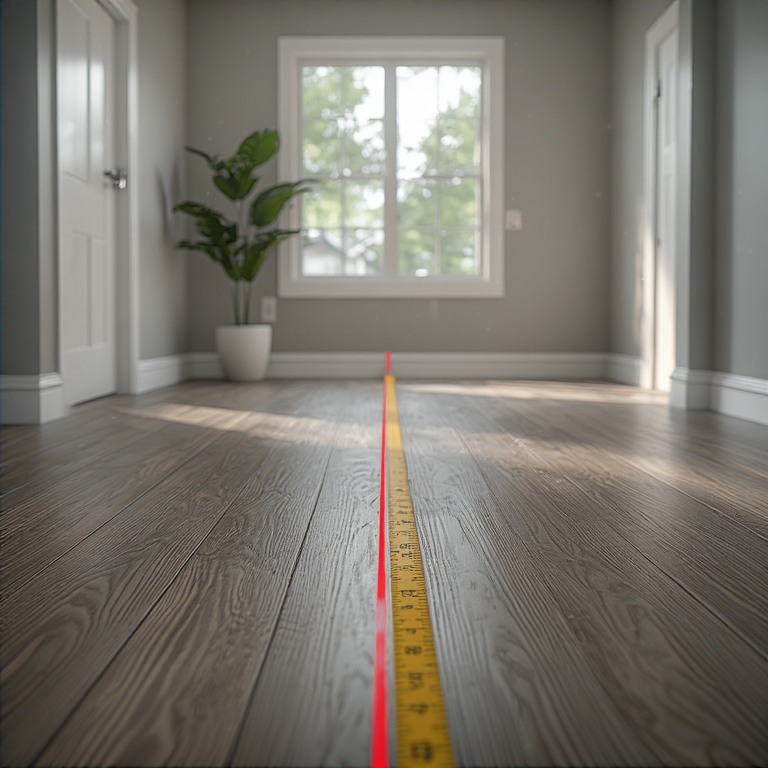

A floating LVP floor is not nailed or glued to the subfloor. The planks click together into one large sheet that rests on the floor beneath it, held in place by its own weight and the baseboards around the edge. That is why floating installs go quickly and why so many homeowners in Manassas, Woodbridge, Gainesville and across Prince William County choose them. It is also why the same handful of problems show up again and again: a hollow sound underfoot, a bumpy subfloor that shows through the planks, joints that separate, and awkward transitions at doorways. None of these problems is a flaw in the idea of a floating floor. Almost all of them trace back to preparation, underlayment, expansion room and layout decisions made on installation day. This guide explains each problem, what causes it and what a careful installer does to prevent it. If you want the broader comparison between floating and bonded floors, our guide on glue down LVP flooring covers that decision. Here we focus on making a floating floor work well. At Floors and Beyond VA, we install floating LVP regularly, and we know where these floors go wrong.
PROBLEM ONE: A HOLLOW OR CLICKY SOUND
The most common complaint about floating LVP is sound. Because the planks rest on top of the subfloor and are not bonded to it, footsteps can produce a hollow, drum-like tone, especially on a concrete slab or a stiff plywood subfloor. Several things contribute.
The plank itself. A thin, rigid plank transmits more sound than a thicker one with a quiet core. An attached pad on the back absorbs some of that sound.
The underlayment. A good underlayment dampens the tone and reduces the click of planks against the subfloor. A thin or compressed underlayment, or none at all, leaves the floor louder. Our guide to underlayment for LVP flooring explains the types and which are approved for which planks.
The subfloor. Uneven spots create small gaps between the plank and the subfloor. Each gap acts like the inside of a drum, and walking across it produces a tap or click.
The rooms around it. In a big open room with few rugs and bare walls, any floor sounds louder.
What helps: choose a plank with an attached pad or a rated underlayment, fix flat-spot problems before installing, and add area rugs where you walk the most. In condos and townhomes where a neighbor lives below, ask about a documented sound rating, because many associations require one.
PROBLEM TWO: THE SUBFLOOR SHOWS THROUGH
Vinyl plank is thin and slightly flexible, and a floating floor follows the surface under it. If the subfloor has ridges, seams, screw heads or low spots, they can telegraph through the planks as visible bumps or as soft, springy areas underfoot. Two kinds of damage follow. Visible ridges can look like waves when light hits the floor at a low angle. Low spots allow planks to flex at their joints, and repeated flexing can weaken the locking edges until they separate.
Manufacturers publish flatness tolerances, commonly a variation of about three-sixteenths of an inch over ten feet, and the warranty usually depends on meeting them. A straightedge or a long level shows where the floor falls outside the limit. The fixes depend on the material.
Concrete slabs. High spots are ground down. Low spots and cracks are filled with a patching or self-leveling compound that is rated for the flooring and given time to cure. New slabs, and slabs in basements, should also be tested for moisture before anything is installed.
Plywood and plank subfloors. Loose panels are screwed down, squeaks are addressed, raised edges are sanded and low spots are filled or covered with a thin layer of underlayment-grade panel.
Existing floors. Installing over old vinyl, tile or hardwood is sometimes possible, but only if the surface is flat, solid and clean. Embossed vinyl, grout lines and cupped boards can all show through. Our guide to LVP over existing flooring explains when it works.
This is the step that separates a floor that looks good for ten years from one that looks wavy within one season. It is also the step that is hardest to see in a finished floor, so ask your installer how they check and correct flatness.
PROBLEM THREE: EXPANSION, CONTRACTION AND GAPS
Vinyl plank expands slightly when it warms and contracts when it cools. A floating floor is designed to move as a single unit, which is why installers leave a gap, usually about a quarter to three-eighths of an inch, around the entire perimeter and at fixed objects such as pipes, cabinets and thresholds. The baseboard or quarter-round hides the gap. If the gap is too small, or if something pins the floor in place, the planks can buckle upward in warm weather or pull apart at the joints in cold weather.
Common causes of movement problems include the following.
Pinned edges. Baseboards nailed through the plank instead of into the wall, cabinets installed on top of the floating floor, or heavy fixtures that trap the planks.
Too much run. Manufacturers limit how far a floating floor can run in one direction without a break, and the limit is stated in the installation instructions. Long open-plan areas often need a transition strip or expansion break to stay within it.
Sunlight and heat. Large south- and west-facing windows can heat the floor surface well above room temperature. Curtains, film or blinds protect the floor and keep the temperature within the manufacturer's range.
Temperature swings. A floor installed in an unheated or very cold space, or in a house with no air conditioning during summer, can move more than one in a stable climate. Prince William County winters and humid summers make the manufacturer's temperature guidance worth following.
PROBLEM FOUR: SEPARATING JOINTS
Click-lock edges hold the planks together, and they rely on a tight fit. When a joint opens up, you see a thin line between two planks where dirt collects. The causes are usually one of the problems above. Pinned edges, uneven subfloors and thermal movement all pull on the locking edges. Poorly assembled joints, where the installer did not fully close each one, also open over time. So can planks installed in the wrong order, where a long row was snapped in at an angle that stressed the joint. A good installer checks each row as the floor goes down and does not leave tension in the sheet.
If a joint opens after installation, call the installer. A small gap can sometimes be closed by releasing and re-locking the planks. A large one may signal something moving underneath that needs to be corrected.
PROBLEM FIVE: AWKWARD TRANSITIONS AT DOORS AND ROOM EDGES
Because a floating floor needs room to move, you cannot simply butt it against another surface and caulk the seam. The edges need a transition, and the choice of transition affects both the appearance and the performance of the floor. The common types include the following.
T-molding. Sits between two floors of the same height and covers the expansion gap on each side. It is often used in a doorway between two rooms of floating plank.
Reducer. Steps down from the plank to a lower surface, such as tile, vinyl sheet or a thin carpet.
End cap or threshold. Finishes the floor at a sliding door, a fireplace hearth or a place where the plank stops at a vertical surface.
Stair nosing. Wraps the edge of a step, and requires a stair-approved plank and the right installation method.
Transitions are easy to overlook in planning and then frustrating to correct. Decide where they go, how they will look and whether the heights match before the planks are ordered. In doorways where the floor looks best running continuously through, ask whether the manufacturer's run limit allows it.
PROBLEM SIX: HEAVY ITEMS, CABINETS AND FIXED OBJECTS
A floating floor should never be fastened to the subfloor through the planks, and heavy things should not be built on top of it in a way that traps the edges. In kitchens, the common approach is to install the plank up to the cabinets and leave the gap at the cabinet base, covered by trim. In baths, the gap is sealed with a flexible sealant where the plank meets the tub or toilet flange. Islands and heavy appliances are usually fine to place on a floating floor, but permanent cabinets, built-in islands and fireplaces should be set before the floor goes in, not on top of it. If you plan to add cabinetry later, tell your installer so the layout can allow for it.
TALK TO AN INSTALLER BEFORE YOU ORDER
Many floating-floor problems are designed in before a single plank is opened. Your layout, your room dimensions, your subfloor and your sunlight exposure all matter. Floors and Beyond VA offers in-home estimates in Manassas, Woodbridge, Gainesville, Haymarket and across Northern Virginia. Schedule an in-home estimate at floorsandbeyondva.com/Contact or call (703) 906-5698, and we will check your subfloor, measure your rooms, show you samples and explain where transitions and breaks should go.
HOW A GOOD FLOATING INSTALL IS DONE
Acclimate the planks. Boxes sit in the house, in the rooms where they will be installed, for the time the manufacturer specifies, with the heating or cooling running.
Test and prepare the subfloor. Moisture is tested on slabs, flatness is checked with a straightedge and problems are corrected before anything goes down.
Install the underlayment. The right product goes in, seams are taped if required and a vapor barrier is used on concrete when the manufacturer calls for it.
Plan the layout. The starting wall is chosen so the final row is not a sliver, and plank ends are staggered so seams do not line up.
Leave the gap. A consistent perimeter gap is maintained with spacers, and pipes and fixed objects get their own clearance.
Lock every joint. Each row is checked for a full lock before the next one is started.
Finish the edges. Baseboard or quarter-round is fastened to the wall, not the floor, and transitions are installed according to the instructions.
Check and explain. The finished floor is walked, any problems are corrected and care instructions are left in writing.
FLOATING LVP IN PRINCE WILLIAM COUNTY HOMES
Many homes in Manassas, Bristow, Gainesville and Woodbridge were built on slabs or over engineered subfloors, and many have finished basements. Slab homes call for moisture testing and a flatness check. Townhomes often have open main levels where run length matters. Basements may have uneven spots and cold floors, which a pad helps with. Homes built over crawl spaces can have wood subfloors that need re-fastening. In older neighborhoods around Manassas, the floors underneath may have layers of vinyl, adhesive and patching that need to be dealt with before anything new goes down. A site visit identifies these conditions before they turn into problems.
WHEN FLOATING IS NOT THE BEST CHOICE
Floating floors are a good choice in many rooms, but not all. Very large open areas that exceed the run limit, rooms with heavy rolling loads, spaces with strong temperature swings and stairs often work better with a glued installation. Rooms where a floor that feels quiet and solid underfoot matters most may also do better bonded. Our guide on glue down LVP flooring explains how to decide. A good installer will tell you if your room is better suited to another method rather than force a floating install.
CARE TIPS THAT KEEP A FLOATING FLOOR HEALTHY
Use felt pads under furniture and avoid dragging heavy items. Keep the home at a steady temperature year round. Wipe up spills so water cannot work its way into the joints. Use a damp mop and a manufacturer-approved cleaner, and skip steam. Protect floors from strong direct sun. Keep a few extra planks from the same production run for repairs. If you notice a joint lifting, a noise that is new or a spongy spot, call your installer early. Our guide on how to clean LVP flooring explains the routine.
HOW FLOORS AND BEYOND VA APPROACHES FLOATING FLOORS
Floors and Beyond VA does not treat a floating floor as the easy option. We treat preparation as the job. We test the subfloor, correct flatness, choose an underlayment that suits the plank and the building, plan the layout and set the transitions before opening the first box. Our crews are our own employees, and we explain the plan in writing. If a different method suits your room better, we say so.
PLANNING THE LAYOUT BEFORE THE FIRST ROW
Layout is invisible when it is right and obvious when it is wrong. Most installers start along the longest, straightest wall or from the center of the main room, so rows run parallel to the main light source or the long dimension of the space. The goal is to avoid ending with a narrow sliver of plank along the last wall, and to stagger the end joints by at least several inches so the seams do not form a pattern. In homes with open floor plans, the direction chosen in one room continues into the next, and the run limit decides where a break is needed. Walking the space with the installer before work begins, and agreeing on direction and transitions, prevents the surprises that are hardest to correct after the planks are down.
WHAT TO DO IF YOU ALREADY HAVE A PROBLEM FLOOR
If you already have a floating floor that sounds hollow, shows ridges or has opened joints, do not assume it needs to be ripped out. Many problems can be corrected. Pinned baseboards can be refastened to the wall. Gaps can sometimes be closed by releasing and re-locking planks. A subfloor problem in one area may be fixed by lifting just that section. Ask the original installer first, and keep your warranty paperwork. If a second opinion helps, a flooring company can inspect the floor and tell you whether the cause is minor or structural.
FREQUENTLY ASKED QUESTIONS
Why does my floating floor sound hollow? Usually an uneven subfloor, thin underlayment or no pad. A better underlayment and flatness correction reduce it.
Can a floating floor go over a bumpy subfloor? Not without preparation. Bumps and dips show through and can weaken the joints.
How much room does a floating floor need to expand? Typically about a quarter to three-eighths of an inch at the perimeter, but follow the manufacturer's instructions.
Why are there gaps between my planks? Pinned edges, subfloor movement, temperature swings or joints that were not fully locked.
Do I need transitions between rooms? Often yes, especially in long runs or doorways, depending on the manufacturer's limits.
Can I put heavy furniture on a floating floor? Yes, but use felt pads and avoid fastening anything through the planks.
Can a damaged plank be replaced? Yes. In a click-lock floor, the surrounding planks may need to be released, so keep spares.
READY TO GET YOUR FLOATING FLOOR RIGHT?
If you are planning a floating LVP floor, the best protection is a careful look at your subfloor and layout before you buy. Floors and Beyond VA is a family-owned flooring company serving Fairfax, Loudoun, Prince William and Arlington counties since 1987. Schedule an in-home estimate at floorsandbeyondva.com/Contact or call (703) 906-5698.