
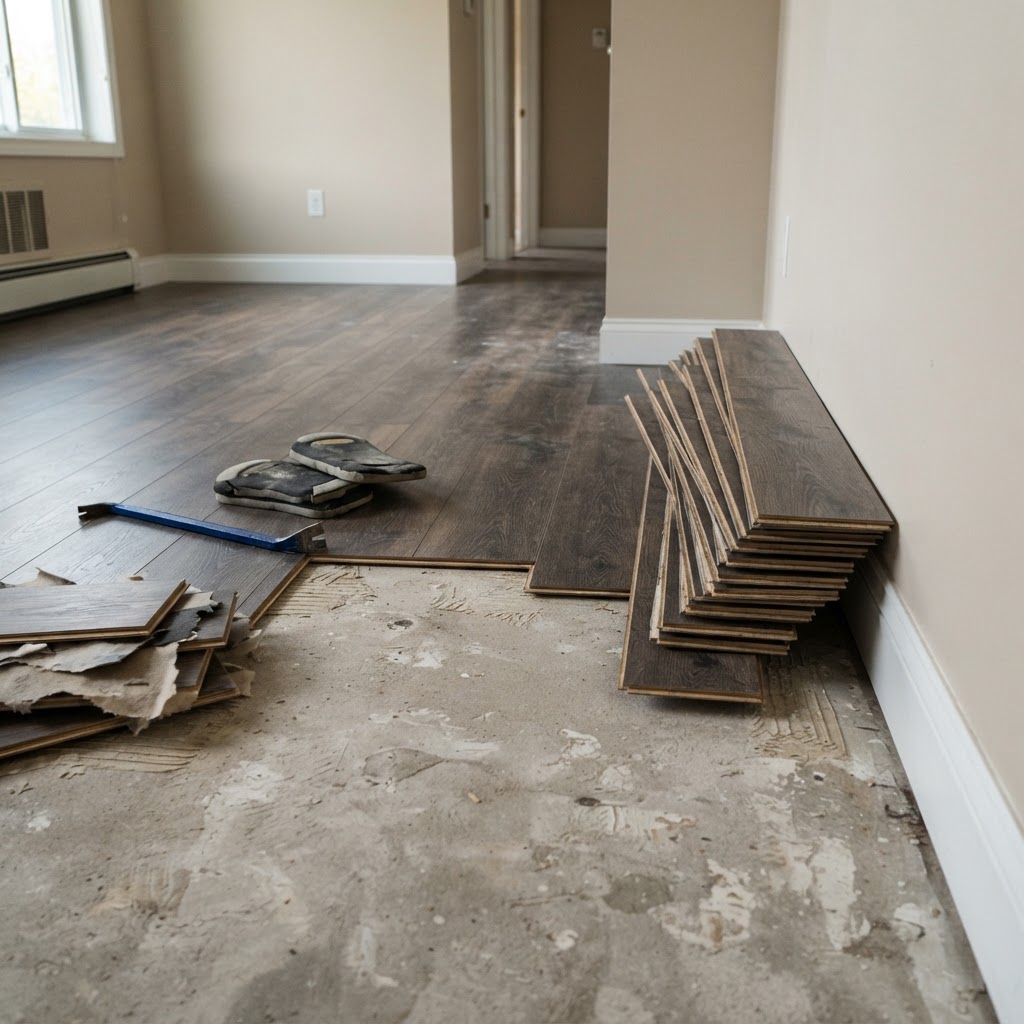
Luxury vinyl plank is everywhere in Northern Virginia homes. It went into thousands of basements, kitchens, and rentals over the past fifteen years, and much of it is still performing well. But floors do not last forever, and tastes change. Homeowners remove LVP for many reasons: water damage from a leak or a basement flood, planks that have separated or peaked, a dated color, an upgrade to hardwood, a remodel that changes the layout, or simply a floor that was a poor-quality product to begin with.
Removing LVP can be quick and simple, or it can be slow and demanding. The difference comes down to how the floor was installed and what it was installed over. This guide explains how to identify your installation type, how removal works for each, what you are likely to find underneath, and how to prepare the subfloor for whatever comes next.
Why the Installation Method Matters
There are two main ways LVP is installed in homes.
Floating installation. Most rigid core LVP, including SPC and WPC planks, is installed as a floating floor. The planks click together along their edges and rest on the subfloor, often with an underlayment beneath. They are not fastened or glued to the floor. The flooring is held in place by its own weight and the trim around the edges.
Glue-down installation. Some LVP, particularly thinner flexible planks and many commercial-grade products, is glued directly to the subfloor with adhesive. Glue-down installation is common in some condos, commercial spaces, and areas where a very stable, quiet floor was desired.
There is also loose-lay vinyl, which has a heavy backing that grips the floor without adhesive, and peel-and-stick vinyl, which has adhesive pre-applied to the back of each plank or tile. Peel-and-stick removal is similar to glue-down, though usually less difficult.
How to tell which you have. Remove a floor vent and look at the edge of the plank. If you see a click profile, a rigid core, and no adhesive beneath, it is almost certainly floating. Try lifting the edge of a plank at a doorway after removing the transition strip. A floating plank lifts and unclicks. A glue-down plank resists and shows adhesive on the subfloor.
Before You Start
A little preparation makes removal safer and cleaner.
Clear the room completely, including furniture and rugs.
Remove baseboards or quarter round carefully if you plan to reuse them. Use a putty knife and a pry bar against a scrap of wood to avoid damaging the wall. Number the pieces on the back so they go back in the same places.
Remove transition strips and thresholds at doorways.
Take the doors off their hinges if the floor runs underneath them.
Protect adjoining rooms from dust and debris.
Wear knee pads, work gloves, and safety glasses. Cut edges of vinyl and the core can be sharp.
Important: if your home is older and the LVP was installed over an older vinyl or tile floor, be cautious. Older resilient flooring and adhesives, particularly from the mid-twentieth century, may contain asbestos. Do not sand, grind, or scrape old flooring or black adhesive underneath without having it tested. Northern Virginia has many homes built between the 1950s and 1980s where this is a real consideration.
Removing Floating LVP
Floating floors are the easiest to remove.
Start at the wall where the last row was installed, often the wall opposite the starting wall, or at any edge where you can get a grip. Lift the first plank at an angle along its long edge to release the click joint. Work along the row, angling and lifting each plank to unclick it from its neighbor. Then move to the next row.
Planks usually separate cleanly if you lift at the right angle rather than pulling straight up. If a plank resists, it may be pinned by trim, a cabinet, or a transition strip that is still in place.
If you plan to reuse the planks, which is sometimes possible for a small area such as a basement storage room, stack them flat and handle them carefully to protect the locking edges. Damaged locking profiles will not click together properly again.
Once the planks are up, remove the underlayment. Foam or felt underlayment may be taped at the seams and comes up in sheets. If the planks had an attached pad, there may be nothing else to remove.
A floating LVP floor in a typical room can come out in a short time, often much faster than it took to install.
Removing Glue-Down LVP
Glue-down removal is more physical and slower.
Start at an edge or a seam. Use a stiff floor scraper, a putty knife, or a flat pry bar to get under the edge of a plank. Work the scraper under the plank, lifting as you go. Some adhesives release fairly easily. Others hold tight.
Heat can help. A heat gun or hair dryer warms and softens many adhesives, letting the plank peel away more easily. Work in small sections and keep the heat moving to avoid scorching the subfloor.
For large areas, a long-handled floor scraper or a powered floor stripper speeds the work considerably. Powered strippers can be rented and are often used by professionals for larger glue-down removals.
After the planks are removed, adhesive residue remains on the subfloor. How much needs to come off depends on what will be installed next. New glue-down flooring often requires a clean, flat surface free of old adhesive, or an adhesive compatible with what remains. Floating floors and carpet are more forgiving, but lumps and ridges of old adhesive must still be removed so the new floor sits flat.
Adhesive residue can be scraped, and some types respond to adhesive removers designed for flooring. Follow product instructions, ventilate the area, and confirm that any remover will not interfere with the new floor's adhesive or warranty. Again, never sand or grind old black adhesive without testing for asbestos first.
What You Will Find Underneath
The real question in many removal projects is not the vinyl itself. It is the subfloor and what condition it is in.
Concrete slab. In basements and slab-on-grade homes across Loudoun, Prince William, and Fairfax counties, LVP is often installed directly over concrete. After removal, look for cracks, uneven areas, old adhesive, efflorescence (white powdery deposits that indicate moisture moving through the concrete), and staining. Moisture testing is important before installing a new floor over concrete, especially in basements.
Plywood or OSB. On upper floors and over crawl spaces, LVP usually sits on a wood subfloor. Look for soft spots, water staining, delamination, mold, loose panels, and squeaks. Wood subfloors damaged by leaks may need sections replaced.
Old flooring. Some LVP was installed over existing tile, sheet vinyl, or even hardwood. If you find another layer underneath, you will need to decide whether to remove it, leave it, or install over it, depending on its condition and the next floor.
Hardwood. Occasionally, homeowners remove LVP and find original hardwood underneath. If the LVP was floating, the hardwood may be in good shape and could be refinished. If it was glued down, the hardwood may need significant work.
Signs of Water Damage
Many LVP removals happen after a leak or flood. LVP is waterproof on top, but water can still travel through seams and around edges and become trapped underneath, where it cannot evaporate. When you remove the floor, check for:
Wet or damp subfloor.
Mold or mildew on the subfloor or underside of the planks.
A musty odor.
Dark staining on wood subfloors.
Soft or spongy areas.
If you find any of these, the subfloor must be fully dried and any damaged materials repaired or replaced before new flooring goes down. Installing new flooring over a wet or moldy subfloor traps the problem and leads to failure. In a flood situation, it is wise to bring in a water mitigation professional to dry the area properly and to identify the source.
Preparing the Subfloor for New Flooring
Once the old LVP is gone, the subfloor needs to be prepared for whatever comes next. Every flooring product has requirements for flatness, moisture, and cleanliness, and meeting them is essential to a lasting installation and to the manufacturer's warranty.
For new LVP. Rigid core LVP requires a flat subfloor within the manufacturer's tolerance. High spots may need to be ground down, low spots filled with patching or self-leveling compound, and old adhesive ridges removed.
For hardwood. Solid hardwood requires a wood subfloor in good condition and is not typically installed directly over concrete. Engineered hardwood can go over concrete with proper moisture testing and a vapor barrier.
For tile. Tile requires a stiff, stable subfloor and often an underlayment or uncoupling membrane.
For carpet. Carpet is the most forgiving, but the subfloor should still be clean, dry, and free of major lumps.
Should You Remove LVP Yourself
Removing a floating LVP floor in a single room is a manageable project for many homeowners. Removing glue-down LVP across a large area, dealing with water damage or mold, or preparing a subfloor for a new installation is more involved and benefits from professional equipment and experience.
There is also a practical benefit to having your flooring company handle removal. The same crew that removes the old floor can inspect the subfloor, address problems they find, and prepare it to the exact requirements of the new floor. That continuity reduces the chance of surprises during installation.
Disposal
Old LVP, underlayment, and adhesive scraps must be disposed of properly. Many Northern Virginia jurisdictions have rules about construction debris. Professional removal typically includes hauling away and disposing of the old material.
Removing LVP From Stairs
LVP on stairs is installed differently from floors. Each tread usually has a vinyl plank glued to it, with a separate stair nosing glued or fastened at the front edge, and risers may be covered with vinyl or painted. Removing stair LVP means prying up the nosings, scraping the treads free of adhesive, and preparing the stair for the next material. Because stairs are steep and adhesive removal on treads is slow, this is a job many homeowners prefer to leave to a professional, particularly when converting the stairs to hardwood.
Removing LVP in Condos and Townhomes
In condos across Tysons, Reston, Arlington, and Alexandria, flooring removal often involves building rules. Many associations restrict working hours, require advance notice, and require elevator reservations for debris removal. Some require that replacement flooring meet sound transmission standards, which may mean a specific underlayment. Check with your association before scheduling removal, and make sure your flooring company carries the insurance your building requires.
In townhomes and condos with LVP glued to concrete, removal can also be noisy, and neighbors appreciate a heads-up.
Timeline and What to Expect
A typical floating LVP removal in a single room is quick. Glue-down removal takes longer, especially if the adhesive is strong or the area is large. Subfloor repairs and leveling, if needed, add time, and self-leveling compounds need time to cure before new flooring goes down. When the new floor is installed by the same company, removal, preparation, and installation can be scheduled as one continuous project so your home is out of use for as short a time as possible.
Frequently Asked Questions
Can I install new LVP over old LVP? Generally, no. Most manufacturers do not allow installing a floating floor over another floating floor. The combined movement and thickness cause problems, and you would miss the chance to inspect the subfloor.
Can removed LVP be reused? Floating planks sometimes can be, if they come up without damaging the locking edges. Glue-down planks usually cannot.
What if I find mold under the LVP? Stop work in that area, keep it ventilated, and have the source of moisture identified. Mold should be properly remediated and the subfloor dried before new flooring is installed.
Do I need to remove baseboards? For floating floors, it depends on whether quarter round was used. If quarter round covers the expansion gap, removing it may be enough. Floors and Beyond VA can advise on the best approach for your trim and your new floor.
Choosing What Goes Down Next
Removal is the moment to decide what your next floor should be, and what you learned underneath should guide that choice.
If the LVP failed because of moisture from a slab or a recurring basement leak, fix the moisture source first, then consider a floor rated for the conditions, with a proper moisture barrier. Rigid core LVP is still often the right answer for Northern Virginia basements, but only once water is managed.
If the LVP failed because the planks separated or peaked, the cause may have been an uneven subfloor, a pinned floor without expansion gaps, or a low-quality product. Correcting the subfloor and installing a better product with proper gaps solves most of these problems.
If you simply want an upgrade, removal opens options such as engineered hardwood over a properly prepared slab, solid hardwood over a sound wood subfloor, or tile in wet areas.
Tools You Will Need
For floating LVP: a flat pry bar, a putty knife, a utility knife, a hammer, work gloves, knee pads, safety glasses, and contractor bags or a place to stack planks.
Keep a marker handy to label trim pieces as they come off.
For glue-down LVP: everything above, plus a long-handled floor scraper, a heat gun, and possibly a rented powered floor stripper for large areas. Have a shop vacuum ready for debris, and plan for disposal of heavy rolls and boxes of old flooring.
How Floors and Beyond VA Handles LVP Removal
Floors and Beyond VA removes and replaces flooring across Northern Virginia every day, from basements in Woodbridge and Manassas to townhomes in Reston and Herndon to single-family homes in Ashburn and Leesburg. We have been doing this work since 1987, with our own in-house crews and no subcontractors.
When we remove LVP, we take care to protect your walls, trim, and adjacent floors. We inspect the subfloor once the old floor is up, test for moisture where needed, and explain what we find. If repairs or leveling are required, we handle them before the new floor goes in. And we haul away the old material when we are done.
If you are ready to replace LVP that is damaged, dated, or simply not working for your home, book a free in-home estimate with Floors and Beyond VA at floorsandbeyondva.com/Contact. We will look at your current floor, talk through what you want next, and plan the removal and installation from start to finish.
Summary
Floating LVP unclicks and comes up quickly. Glue-down LVP requires scraping, sometimes heat, and adhesive removal. Older homes may have hidden layers and adhesives that should be tested before disturbing. The most important part of any removal is what you find underneath, and the subfloor must be dry, sound, and flat before the next floor goes down.

