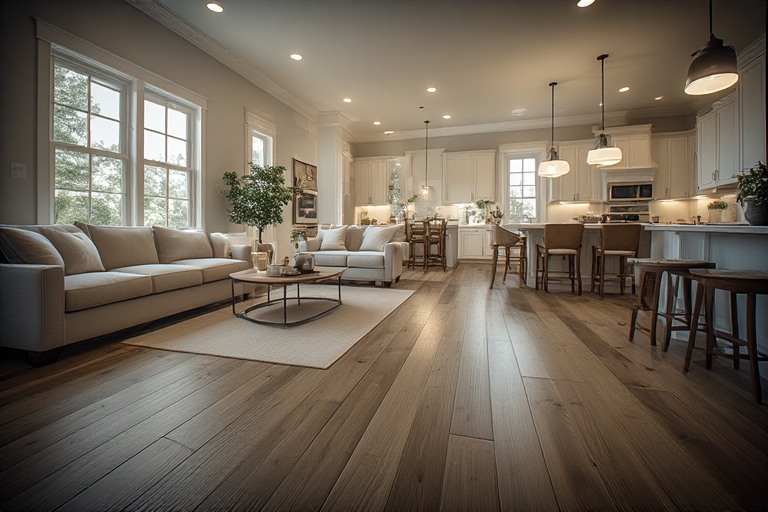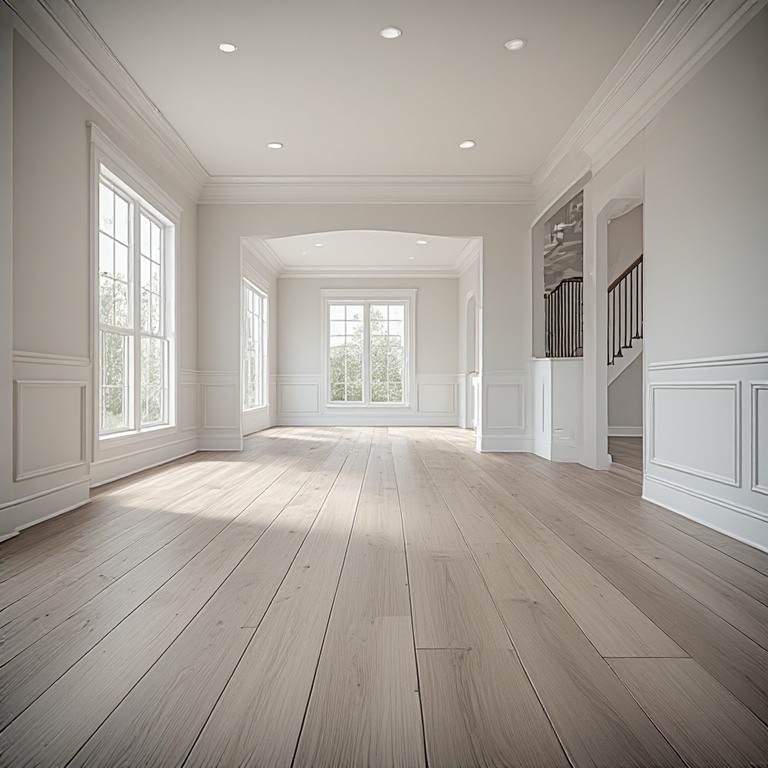

New Home Construction Flooring in Northern Virginia
In new home construction, flooring should be installed after the house is fully enclosed and dried in, after drywall, texture, and painting are essentially complete, and after the heavy trades (framing, mechanical rough-ins, masonry, and most cabinet and trim installation) are finished, but before the final trim, paint touch-ups, and appliance and fixture installation. Tile usually goes in earlier than hardwood because it is not moisture-sensitive in the same way, while site-finished hardwood needs the structure's humidity to stabilize first, followed by acclimation, subfloor moisture testing, installation, sanding, and finishing. The exact order depends on the flooring type, the cabinet plan, and the trim package. Floors and Beyond VA, a family-owned Northern Virginia flooring and remodeling contractor serving Fairfax, Loudoun, Prince William, and Arlington counties since 1987, installs hardwood, tile, and luxury vinyl plank with in-house crews and coordinates the timing with the builder's schedule so the floors are protected and installed at the right moment.
Flooring timing is one of the most common sources of friction on a new build. Install too early, and the floor is scratched, dented, stained, or water-damaged by every trade that follows. Install too late, and the schedule slips, trim has to be removed and reinstalled, and the closing date is at risk. Install before the house has stabilized, and hardwood cups, gaps, or buckles in the first year. This guide lays out a practical timeline for homeowners, builders, and custom-home clients across Northern Virginia, explains why each step matters, and shows how to coordinate flooring with cabinetry, trim, tile, and paint.
If you are planning a custom build, an infill home, or a teardown rebuild, our new home construction page explains how Floors and Beyond VA approaches scope, budget structure, and weekly scheduling.
Why flooring timing matters more than most people expect
Floors are the largest finished surface in the house, and they are also the most vulnerable. A few facts shape every new-construction schedule.
Wood is a moisture-responsive material. Hardwood absorbs and releases moisture with the seasons and with the environment around it. A new house is full of moisture: wet concrete, wet framing lumber, drywall compound, texture, paint, and sometimes rain that arrived before the roof or windows. If the wood goes in before the house has dried and the HVAC has stabilized the interior, it will move once the house reaches its normal conditions.
Every trade after the floor is a risk to the floor. Painters drip. Tile setters spill thinset. Plumbers drag tools. Cabinet installers drop things. Appliance delivery crews roll heavy equipment. Even careful trades cause damage when a floor is exposed.
Trim and cabinets interact with the floor height. Baseboards, casing, cabinet toe kicks, and door bottoms are all affected by finished floor height. Installing them in the wrong order means cutting, patching, or caulking later.
Finishing takes time. Site-finished hardwood must be sanded, stained (if desired), coated, and cured. During curing, the floor cannot take heavy traffic, and the house may need to stay quiet for days.
A good timeline respects all of this.
The new-home flooring timeline at a glance
Here is the typical sequence from foundation to move-in, with the flooring decisions that belong at each stage.
- Design and selection (before or during framing)
- Subfloor and slab preparation (during framing and rough-ins)
- Drywall, texture, and prime (house enclosed and conditioned)
- Tile and wet-area flooring (typically before cabinets and hardwood)
- Moisture testing and hardwood acclimation
- Hardwood installation, sanding, and finishing
- Cabinets, trim, and interior doors, in coordination with the floor
- Final paint, fixtures, and appliances, with floor protection in place
- Final cleaning, inspection, and walkthrough
The details below explain each stage and the most common ways it goes wrong.
Stage 1: Selection and design, long before the first board is laid
The best flooring schedules begin with decisions made early.
Choose the material and species before framing is done. Hardwood species, board width, and finish affect ordering lead times, subfloor flatness requirements, and sometimes the structural detailing. Wide-plank flooring, for example, usually benefits from a very flat subfloor and careful moisture control.
Decide where the floor changes. A new home has many transitions: kitchen to living room, entry to hallway, mudroom to garage entry, bedroom to bathroom. Deciding where materials meet early allows the builder to set slab depressions, subfloor heights, and underlayment layers so thresholds finish flush.
Plan stairs and landings. Stair treads, risers, and landings are part of the flooring scope. Knowing whether stairs will be hardwood, carpet, or painted risers with wood treads affects framing, finish carpentry, and the installation sequence.
Coordinate with the cabinet plan. Whether hardwood runs under the cabinets or stops at the toe kick is a decision with consequences for height, future repairs, and the finished look. Settle it before the cabinets are ordered.
Order early. Specialty species, wide plank, and custom-milled stair parts can take weeks. Ordering after drywall is a common cause of delay.
For a sense of material options, the wood flooring, vinyl flooring, and tile and stone pages at Floors and Beyond VA describe the range of products and installation approaches.
Stage 2: Subfloor and slab preparation
The subfloor is the foundation of the floor. In new construction, it is also the part that is easiest to fix early and hardest to fix later.
Plywood or OSB subfloors
On framed floors, the subfloor is typically plywood or oriented strand board over joists. Important points:
- Flatness. Hardwood and large-format tile both demand a flat subfloor. Humps, dips, and ridges telegraph through the finished floor. Flattening is much cheaper and easier before the walls and cabinets are in place.
- Fastening. Squeaks are usually born here. Screws, adhesive, and proper spacing reduce movement.
- Exposure to weather. If the subfloor has been rained on during construction, it can swell, delaminate, or hold moisture. It needs to dry, and it needs to be tested.
- Protection. Subfloors that will receive hardwood should be kept clean and dry, with protection from trades.
Concrete slabs
In basements, slab-on-grade foundations, and garages, the concrete slab is the substrate. Slabs behave differently:
- They hold a lot of water at the start. A new slab can take a long time to dry, and drying depends on thickness, mix, ventilation, and conditions. Pouring a slab does not mean it is ready for flooring.
- Moisture vapor can rise from below. Even a dry-looking slab can emit moisture vapor. Without a barrier, that vapor can damage adhesives, wood, and vinyl.
- Flatness and cracks matter. Slabs may need grinding, patching, or leveling compound.
Slab preparation is where moisture testing becomes essential, and it is the topic of the next stage.
Stage 3: Wait for the house to be enclosed, dried in, and conditioned
Before any hardwood is delivered, the house should meet a set of conditions.
- The roof, windows, and exterior doors are installed, and the house is weather-tight.
- The HVAC system is operating, ideally controlling temperature and humidity at levels close to what the home will have when occupied.
- Drywall, texture, and priming are complete, and the wet work has dried.
- Concrete work, masonry, and plaster are cured.
- Exterior grading and drainage are directing water away from the foundation.
This is the "dried-in and conditioned" milestone. In practice, builders often schedule hardwood delivery only after this milestone because delivering wood into a damp, unconditioned house invites problems.
In Northern Virginia, where summers are humid and winters are dry, seasonal timing matters. Houses finished in the heart of summer carry high ambient humidity into the interior until the HVAC catches up. Houses finished in winter can be very dry, and wood installed then can swell later when summer humidity arrives. A good flooring contractor accounts for the season rather than treating it as irrelevant.
Stage 4: Tile and wet-area flooring usually go first
Tile is generally installed before hardwood and before cabinetry in many sequences, for several reasons.
Tile is not damaged by moisture the way wood is. Setting tile involves water-based mortar and grout. Those do not threaten tile, but they would threaten nearby hardwood.
Wet areas need waterproofing first. Bathroom floors and shower pans must be waterproofed and tested before tile goes in. Waterproofing is a separate step and must cure properly.
Tile cutting is messy. Dust and slurry are easier to manage before finished hardwood is in place.
Tile heights affect transitions. A tiled bathroom floor sits at a different height than adjacent hardwood. If the tile is installed first, the hardwood contractor can plan transitions around it.
Typical early tile areas include:
- Bathrooms and powder rooms
- Laundry rooms
- Mudrooms and entries
- Kitchen floors (if the plan includes tile)
- Shower walls and floors
Some builders prefer to set kitchen tile after cabinets, others before. This depends on whether the floor runs under cabinets and on how the island is designed. The important point is to decide it early.
If radiant heat is part of the design, it must be installed and tested before tile or other finishes cover it. See our tile and stone page for how Floors and Beyond VA handles tile work in-house.
Stage 5: Moisture testing and hardwood acclimation
This stage is where many new-home hardwood failures are prevented or caused.
Moisture testing the subfloor
Before hardwood installation, the subfloor should be tested.
For wood subfloors, a moisture meter reading compares the subfloor's moisture content to that of the hardwood. The two should be close, and the difference should be within the range specified by the flooring manufacturer and recognized industry guidance.
For concrete slabs, moisture testing may include calcium chloride testing, in-situ relative humidity probes, or surface meters used as a screening tool. Because slabs can emit vapor over time, testing and a vapor barrier decision are part of the plan.
If the readings are too high, the answer is to wait, ventilate, dehumidify, or install an appropriate moisture mitigation system. It is not to install anyway and hope.
Moisture testing the hardwood
The flooring itself should be measured too. Boards delivered from a mill or a lumberyard may have moisture contents that differ from the job site. Measuring the wood tells you whether it needs to adjust.
Acclimation
Acclimation means letting the wood adjust to the environment of the house before installation. The goal is for the wood and subfloor to reach a similar moisture balance in the conditions the home will actually have.
Key points:
- Acclimate in the house, not the garage or a trailer. The environment should match the finished house.
- Open the boxes or bundles and stack the wood so air circulates, following the manufacturer's recommendations.
- The time required varies. It depends on the species, product type (solid versus engineered), the starting moisture content, and the conditions. Some products need only a short period; others need much longer. Measurements, not the calendar, should decide when the wood is ready.
- Engineered hardwood is more dimensionally stable than solid, but it is not exempt from moisture and acclimation requirements.
Skipping acclimation is one of the most common ways new-home hardwood fails. Boards installed too dry swell and cup in humid weather. Boards installed too wet shrink and gap in dry weather.
Stage 6: Hardwood installation, sanding, and finishing
Once the house is stable, the subfloor is tested, and the wood has acclimated, hardwood can be installed.
Unfinished (site-finished) hardwood
Site-finished hardwood is installed raw, then sanded smooth, stained if desired, and coated with a protective finish. Its advantages include a flat, seamless surface, complete control over color and sheen, and the ability to blend between rooms. Its demands include dust (which must be controlled), cure time, and a clean, quiet environment during finishing.
The sequence usually runs:
- Install flooring.
- Rough sand and fine sand.
- Stain, if desired.
- Apply finish coats, with drying time between.
- Allow the finish to cure before heavy traffic and before furniture, rugs, and cabinet installation (cure times vary by product).
Prefinished hardwood
Prefinished hardwood arrives with the stain and coating already applied at the mill. Advantages include faster installation, less dust and odor on site, and a durable factory finish. Considerations include microbevels between boards and less flexibility to adjust color on site.
Where to install hardwood relative to cabinets
This is the question builders and homeowners ask most.
Floor first, cabinets on top. Running hardwood into the cabinet footprint is simple and gives a continuous look, but it raises the cabinet height, complicates dishwasher and appliance clearances, and makes future floor changes more difficult.
Cabinets first, floor to the toe kick. This is common in many homes. The floor stops at the cabinet base, saving material and keeping appliance heights standard. Care is needed to protect the floor edges and handle the final fit.
Hybrid approaches are possible when an island or built-in is involved.
The right choice depends on the design, the appliance plan, and the trim. The rule is to decide it before the cabinets are ordered, not after.
Protecting the floor afterward
After installation and finishing, the floor needs protection until the end of the project. Typical protection includes:
- Heavy-duty floor protection paper or boards, taped only to approved edges
- Rosin paper is common, but it can trap moisture in some cases, so breathable products and manufacturer guidance matter
- Corner and stair protection
- Instructions to trades about footwear, tools, and ladders
Even with protection, the best strategy is to sequence work so that the floor is exposed to as little heavy trade traffic as possible.
Stage 7: Cabinets, trim, and doors, coordinated with the floor
The relationship between floor and trim is the most precise coordination in a new build.
Baseboards
Baseboards sit on the finished floor line. If the baseboards go in before the floor, the floor installer must cut around them, and gaps appear. If the floor goes in before the baseboards, the baseboard installer must scribe to the floor, and the floor is exposed during trim work.
Many builders use a hybrid approach: install baseboards after the floor is finished, then use a shoe mold or quarter round to cover the expansion gap. Others install baseboards first and cut the floor to them. Each has tradeoffs, and the best approach depends on the finish, the baseboard height, and how the project is staged.
Door casing and jambs
Door jambs are often undercut so flooring can slide beneath. In new construction, the sequence matters. If the casings are installed before the floor, the installer undercuts them. If after, the trim carpenter scribes to the finished floor.
Interior doors
Doors should be hung with the finished floor height in mind. If the floor height changes after the doors are hung, doors may drag or leave large gaps. Hanging doors after the floor is complete is common.
Stair parts
Stairs are a major coordination point. Treads, risers, nosings, balusters, and handrails all interact. A typical sequence installs treads and risers before handrails and balusters, with finishing and protection planned between.
Cabinet toe kicks
Cabinet toe kicks should be designed with the floor thickness in mind. If the floor is installed to the cabinet, the toe kick should end at the right height. If the floor runs under, the toe kick is on top of the floor.
Built-ins and fireplaces
Built-in bookcases and hearths are similar to cabinets. They must be coordinated with the floor, and the transition around a hearth is typically planned in advance.
Stage 8: Final paint, fixtures, and appliances
After the floors are down and trim is installed, the final tasks begin.
- Paint touch-ups. Painters should protect the floor and use drop cloths designed for finished floors.
- Plumbing and electrical fixtures.
- Appliance delivery. Delivery crews should use floor protection, particularly for refrigerators, ranges, and washers.
- Interior door hardware and cleanup.
This is a common stage for floor damage. Planning the protection in advance, and communicating with every trade, is far less expensive than repairing the floor later.
Stage 9: Final cleaning, inspection, and walkthrough
Before move-in, the floors should be cleaned with manufacturer-approved products, inspected, and touched up if necessary.
A final walkthrough should check:
- Gaps, cupping, or movement
- Squeaks
- Finish uniformity
- Transitions and thresholds
- Stair treads
- Edges around cabinets, tubs, and thresholds
- Grout and sealer condition on tile
The homeowner should also receive care instructions. Our floor care page explains how to maintain different floor types after installation.
A sample new-construction schedule
Every project is different, but here is a representative sequence for a custom home. Durations are illustrative and depend on size, weather, and trade availability.
| Phase | Typical sequence |
|---|---|
| Foundation and framing | Subfloor installed, slab poured, structure framed |
| Dry-in | Roof, windows, and exterior doors installed |
| Mechanical rough-ins | Plumbing, electrical, HVAC, low-voltage |
| Insulation and drywall | Insulation, drywall hanging, taping, texture |
| Prime and first coat | Initial painting, house conditioned by HVAC |
| Tile and wet areas | Waterproofing, tile in bathrooms, laundry, mudroom, kitchen (if tile) |
| Hardwood delivery and acclimation | Moisture testing, acclimating in the conditioned house |
| Hardwood installation and finishing | Install, sand, stain, coat, cure |
| Cabinets and built-ins | Installed with floor protection in place |
| Trim and doors | Baseboards, casing, doors, stair parts |
| Final paint | Touch-ups and finish coats |
| Fixtures and appliances | Plumbing, electrical, appliances installed |
| Final clean and inspection | Walkthrough and punch list |
Some builders move hardwood after cabinets; some schedule hardwood before cabinets. Both can work. What does not work is leaving the decision to the last minute.
Different materials, different timing
Hardwood
As described above: late in the sequence, after drywall and paint are largely done, after acclimation and testing, and protected afterward.
Tile
Early to mid-sequence, after rough-ins and waterproofing, before or around cabinet installation depending on the plan.
Luxury vinyl plank
LVP is a floating or glue-down floor that is less sensitive to moisture and does not require sanding or finishing. It is usually installed after drywall and paint and before cabinets in many plans, but because it is relatively soft compared with tile, it still needs protection from trades. Subfloor flatness and cleanliness remain important. See the vinyl flooring page for more.
Carpet
Carpet is typically the last flooring installed, after painting and most trades are done, because it is easily stained and damaged. Stairs and bedrooms are the usual locations. Our carpet page has details.
Rubber and specialty floors
Garage, gym, and utility floors follow their own sequence, often after the structure is complete. The garage flooring and rubber flooring pages cover those options.
Special considerations for Northern Virginia builds
Building in Fairfax, Loudoun, Prince William, and Arlington counties brings specific realities.
Seasonal swings. The humid summers and dry winters make humidity control essential. A home finished in July and occupied in January will behave differently than one finished in October.
Permitting and inspection timelines. Fairfax, Loudoun, and Prince William each have their own permit and inspection processes. Inspections can affect when floors can be installed. A rough-in inspection must pass before drywall, for example, and final inspections affect closing timelines.
Infill and teardown projects. Many Northern Virginia projects, particularly in Fairfax County neighborhoods like McLean, Vienna, and Falls Church, are teardown rebuilds on tight lots. Limited staging space, neighbor impact, and storage constraints affect when materials can be delivered and where wood can acclimate.
Clay soils and basements. Northern Virginia's clay-rich soils can hold water around foundations. Basement slabs and below-grade floors need moisture testing and thoughtful material choices.
HOA rules. Many communities in Loudoun and Prince William have HOA requirements affecting delivery hours, noise, and material storage.
Heat and sun. Large windows and south-facing exposures can accelerate fading and movement in hardwood. Material selection and finish choices should reflect this.
These considerations are part of why working with a Northern Virginia flooring contractor who knows the area helps. Floors and Beyond VA has been installing floors across the region since 1987.
Common new-construction flooring mistakes
- Installing hardwood before the house is dried in and conditioned.
- Skipping moisture testing on subfloors and slabs.
- Skipping or shortening acclimation.
- Ordering flooring late. Lead times can stall a schedule.
- Not coordinating floor heights with cabinets and appliances.
- Letting trades work on unprotected floors.
- Installing baseboards and then trying to fit the floor to them without planning.
- Ignoring transitions until the end. Thresholds between rooms should be planned early.
- Running the HVAC at inconsistent settings. Large swings in temperature and humidity stress the wood.
- Choosing a floor without considering the house's humidity profile. Wide-plank solid hardwood in a house that swings widely in humidity is a risk.
- Underestimating cure time for site-finished floors. Rushing furniture, rugs, and cabinets onto a floor that has not cured can mark or damage the finish.
- Splitting responsibility. When flooring is divided among several contractors, nobody owns the whole result. Single-source responsibility reduces conflicts.
What drives the scope and schedule of a new-home flooring project
Without quoting any figures, these are the main drivers.
- Square footage and layout complexity. Open plans with long runs are different from compartmentalized plans with many transitions.
- Material type and format. Wide-plank hardwood, herringbone patterns, and large-format tile require more preparation and care.
- Subfloor condition. Flattening, patching, or moisture mitigation add steps.
- Number of transitions and stair runs.
- Finish type. Site-finished floors require more time than prefinished.
- Coordination with other trades. Tight schedules require more communication.
- Site access and storage. Limited access slows delivery and acclimation.
- Season. Winter and summer conditions affect drying and acclimation.
Floors and Beyond VA provides a fixed scope, an itemized budget, and a weekly schedule on new-home projects so the homeowner and builder know what is included and when it will happen. The process starts with a free consultation and a detailed proposal.
How a single in-house crew helps a new-home schedule
Flooring in new construction is a sequence of precise handoffs. When tile, hardwood, vinyl, and carpet each belong to a different subcontractor, delays and finger-pointing are common.
Floors and Beyond VA uses in-house crews and no subcontractors. That means:
- One schedule across tile, hardwood, and other floors.
- One point of accountability for results.
- Consistent standards of workmanship and cleanup.
- Direct communication with the builder or owner.
- Flexibility when other trades shift their dates.
For homeowners acting as their own general contractor, or for builders who want a reliable flooring partner, that consistency matters. For projects that begin as renovations and grow into whole-house work, see our whole-house remodels page, and for broader project planning the home remodeling overview.
One crew, one schedule
Because Floors and Beyond VA handles tile, hardwood, vinyl, and carpet with in-house crews, there is a single point of accountability for the flooring scope, which is exactly what a new-home schedule needs.
Planning flooring when you are building an addition or a partial new build
New construction is not only for whole houses. Many homeowners build additions, and the timeline is similar on a smaller scale. The same principles apply: dry-in, condition, test, acclimate, install, protect. Where the addition meets the existing house, the floors must be matched or transitioned, which adds design questions. If you are adding space, our home additions page explains how Floors and Beyond VA approaches additions, including how we blend new and existing floors.
Questions to ask before you finalize your flooring timeline
Before you sign a schedule, ask these questions of your builder or flooring contractor.
- When will the house be dried in and conditioned?
- Who will test the subfloor and slab moisture, and what readings are acceptable?
- How long will the wood acclimate, and where?
- Will hardwood be installed before or after cabinets?
- How will the floors be protected after installation?
- What is the cure time for the finish, and what work can happen during it?
- How will transitions and stair parts be handled?
- Who is responsible if the floor moves in the first year?
- What is the plan for touch-ups after other trades finish?
- How will the schedule change if the weather or inspections shift?
If the answers are specific, the schedule is probably realistic. If the answers are vague, the schedule probably is not.
Frequently asked questions
How long before move-in should hardwood be installed?
Enough time to install, sand, finish, and cure, plus the later trades that follow. Planning backward from the move-in date is a good approach.
Can hardwood be installed before drywall?
It is generally not recommended. Drywall and paint introduce moisture, dust, and damage risks.
Should flooring go in before or after cabinets?
Both can work. The key is to decide before ordering cabinets and to coordinate heights and appliance clearances.
How long does hardwood need to acclimate?
It varies by product and conditions. Moisture readings, not just time, should guide the decision.
Do I need to test a new concrete slab?
Yes. New slabs can retain significant moisture and may emit vapor for a long time.
Is engineered hardwood better for new construction?
It is more dimensionally stable and suits many slab and below-grade applications, but both engineered and solid hardwood perform well when the process is right.
Should I install carpet first or last?
Last. Carpet is easily damaged by other trades.
Can tile be installed before the house is conditioned?
Tile is less sensitive, but thinset, grout, and waterproofing still need proper curing conditions.
What if my builder wants to rush the floors?
Explain the risks. Cutting acclimation or moisture testing short often costs more in repairs than it saves in time.
Do floors need protection after installation?
Yes. Almost every trade after flooring can damage it.
How are stairs handled in the schedule?
Treads and risers are typically installed before final railings and balusters, with finishing and protection planned in between.
What about radiant heat?
It must be installed and tested before finish flooring, and the floor type affects how the system is designed and operated.
Will the floor change after move-in?
All wood moves a little with the seasons. Proper testing, acclimation, and humidity control keep movement small and uniform.
Does Floors and Beyond VA work with builders and general contractors?
Yes. We work directly with homeowners and with builders, and we handle the flooring scope with in-house crews.
Ready to plan your new-home flooring timeline?
Flooring is a place where good planning shows up for decades, and poor planning shows up in the first year. Floors and Beyond VA brings nearly forty years of Northern Virginia experience, in-house crews with no subcontractors, and a clear, scheduled approach to new-home flooring. We serve Fairfax, Loudoun, Prince William, and Arlington counties, including Ashburn, Leesburg, Reston, Manassas, Woodbridge, Sterling, McLean, and Arlington.
Start with a free in-home consultation. We will review your plans, discuss your schedule, and give you a clear, honest proposal.
Request your free consultation
You can also call (703) 906-5698 or email hello@floorsandbeyondva.com.