Five LVP Mistakes
Woodbridge Homeowners
Make — And How
to Avoid Them.
After four decades of Northern Virginia floors, we've seen every mistake — repeatedly. Here are the five that cost homeowners the most, told straight.
- Mistake 1 — Builder-grade wear layer: The mil rating isn't on the box photo. 6-mil wears through in 3–5 years of normal Northern Virginia family use. Specify 20-mil minimum. Always.
- Mistake 2 — Skipped subfloor prep: A floor that looks flat isn't flat until you check it with a straightedge. LVP needs 3/16" in 10 feet. Missing spots fail at the locking joint first.
- Mistake 3 — Wrong install method for the room: Floating LVP in a below-grade Woodbridge basement without a vapor barrier, or glue-down where floating is the spec. Both fail on a predictable timeline.
- Mistake 4 — No expansion gap: A 1/4" gap at every wall and vertical obstruction. Without it, Northern Virginia's seasonal humidity cycles buckle the floor at the perimeter within 1–2 summers. Baseboard cannot hold it down.
- Mistake 5 — Installing during peak humidity: LVP installed when indoor humidity is above 65–70% locks the planks in an expanded state. When the AC brings humidity down, the planks contract and the gaps appear. The floor was never the problem — the installation conditions were.
- The pattern behind all five: Every one of these mistakes is invisible at the time it's made. The floor looks correct when the crew leaves. The consequences show up 6–18 months later, after the installation warranty has been tested and the homeowner has no recourse.
I've been installing floors in Northern Virginia for close to 40 years. Woodbridge, Lake Ridge, Dale City, the communities along Route 1 — I know these houses. And in four decades, I've seen every LVP mistake there is, often multiple times in a single calendar year. Most of them are invisible when they happen. The floor looks right when the crew walks out. It's six months or a year later, when the gaps open or the edge buckles or the surface goes dull in the traffic lanes, that the homeowner starts asking questions.
What follows is the honest list — not softened, not hedged. These are the five mistakes I see most often in Woodbridge homes specifically, why each one happens, what it costs you, and exactly what to do instead. If you're about to have LVP installed, this is the guide to read first. If you've already had it installed and something looks wrong, this is probably the guide that explains why.
The "waterproof" label on LVP is accurate but incomplete. It means the planks don't absorb liquid water — it says nothing about the wear layer, which is the only thing standing between your floor's surface and the substrate beneath it. Wear layer thickness, measured in mils (thousandths of an inch), determines how long your LVP looks like new under real family use. And the mil rating is almost never visible on the box photography in a big-box store display.
Entry-tier LVP — the product at the $1.50–$2.50 per square foot price point common in Woodbridge new construction and investor flips — typically has a 6-mil wear layer. Six mils is roughly the thickness of two sheets of copy paper. Under the combination of Northern Virginia foot traffic, pet nails, furniture movement, and the fine silica grit that tracks in from outdoor living, a 6-mil wear layer thins visibly within 3–5 years. The surface dulls in traffic lanes. Scratches accumulate below the finish. The floor looks old before its time — and it can't be refinished the way hardwood can.
What makes this mistake so common in Woodbridge specifically is the active investor and new construction market along the Route 1 corridor. Builder-grade LVP is specified by volume at the lowest compliant cost. Homebuyers receive a "waterproof LVP" floor that looks premium at closing and looks tired within a few years of real family use.
Specify 20-mil wear layer as the minimum for any room that sees regular foot traffic. For households with large dogs, children, or high-traffic areas like entries and kitchens, 22–28 mil commercial-grade wear layer is the right specification. The price difference between 6-mil and 20-mil product — typically $0.75–$1.50 per square foot — costs far less over 10 years than replacing a 6-mil floor after 4. Ask for the mil rating in writing before committing to any LVP quote.
"We see 6-mil floors from competing installers regularly — usually when a homeowner calls us because the floor looks older than it should. The conversation is always the same: they paid for 'waterproof LVP,' and it is waterproof. It just has no wear protection left. There's nothing we can do at that point except replace it. Twenty mil is our house minimum. We won't quote below it for a primary residence."
A subfloor that looks flat to the eye is almost never flat to the specification LVP requires. The RFCI standard for LVP installation is 3/16 inch deviation over a 10-foot span — roughly the thickness of two quarters stacked. Most subfloors in Woodbridge homes have multiple locations where they exceed this tolerance, particularly around doorways, in corners, and near structural transitions in older homes. The human eye is not calibrated for 3/16-inch variation across 10 feet. A straightedge is.
When LVP is installed over a subfloor that exceeds flatness tolerance, the locking joints flex with every footstep over the low spots. This causes the locking system to progressively loosen — first audible as a faint hollow sound underfoot, then visible as slight height variation at plank edges, then eventually as joint separation and plank lifting. The failure timeline depends on how far out of tolerance the subfloor was and how much traffic crosses the problem area, but in a Woodbridge family home the progression from installation to visible failure typically runs 12–24 months.
Older Woodbridge homes from the 1970s–1990s are particularly prone to subfloor variation due to decades of settling and prior installation layers. Clay soil movement common in Prince William County contributes to subtle but significant slab-level variation that doesn't resolve without deliberate leveling work before new flooring goes down.
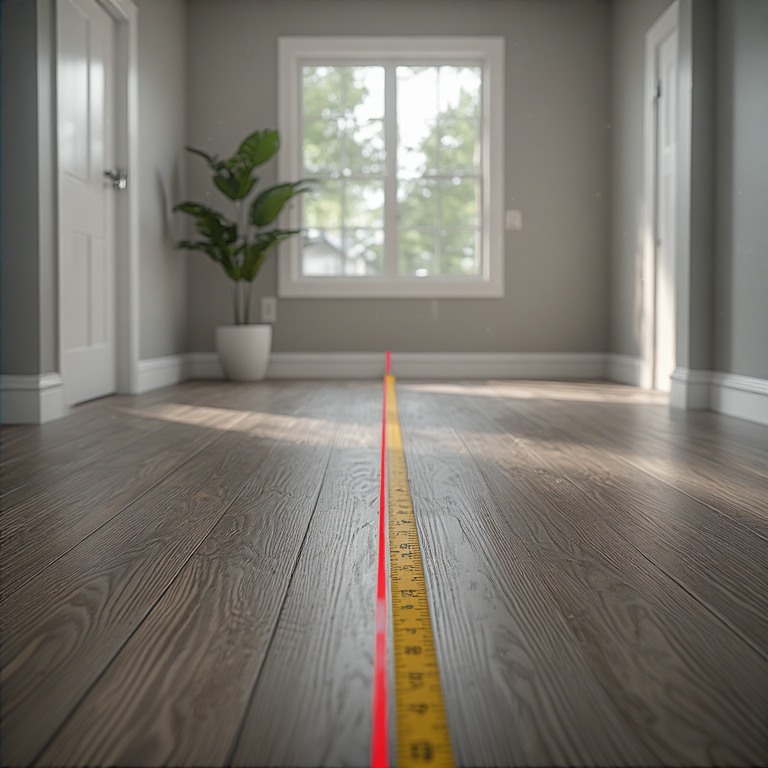
Check subfloor flatness with a 10-foot straightedge or laser level before any LVP installation — across the room in multiple directions, not just a quick visual. Any deviation beyond 3/16 inch is filled with self-leveling compound and allowed to cure before installation begins. This step typically adds $0.50–$1.50 per square foot to the project cost. It eliminates the entire locking joint failure mode. Any installer who skips the flatness check or tells you the floor "looks fine" should be asked directly: what is your flatness spec and how are you measuring it?
"I've gone into Woodbridge homes to assess a failing floor and found low spots of 3/8, even 1/2 inch in a 10-foot run — areas that a homeowner would walk across and feel nothing unusual. The locking joints felt it. Self-leveling compound is not expensive. Replacing a floor that failed because of a prep step that was skipped is."
LVP can be installed three ways: floating (click-lock planks over the subfloor, nothing adhered), glue-down (adhesive applied to the subfloor, planks pressed in), and loose-lay (heavy planks relying on friction and perimeter fastening). Each method has the right application — and using the wrong one for a specific room's conditions is a reliable path to installation failure.
The most common method mismatch in Woodbridge homes involves floating LVP in below-grade or basement-adjacent spaces without adequate moisture vapor barrier protection. Floating installation over concrete requires a properly tested slab and continuous vapor barrier — the absence of either allows moisture vapor to accumulate beneath the floating floor system, leading to the core compression and joint failure described elsewhere in this guide. This mistake is extremely common in Woodbridge because the river-adjacent moisture profile of many Prince William County properties makes below-grade moisture vapor emission a genuine issue that a standard floating installation without vapor mitigation doesn't address.
The second common mismatch is specifying glue-down over radiant heat systems when floating is the correct approach, or floating over a subfloor that has active deflection (bounce) that requires the stability of a glue-down system. Both choices produce visible movement and premature joint failure.
Match the installation method to the specific room conditions: floating for most above-grade applications over properly prepared subfloors; floating with vapor barrier for below-grade concrete; glue-down for rooms with active subfloor deflection, high-traffic commercial-style use, or rolling loads. Moisture test any concrete subfloor before specifying installation method — the test result determines whether standard floating, vapor-barrier floating, or a mitigated subfloor with enhanced vapor protection is the correct approach for that specific Woodbridge home.
"The basement floating installation without vapor barrier is the one I see most in Woodbridge's riverside communities. The installer told the homeowner 'it's waterproof LVP, it'll be fine.' It is waterproof. The slab moisture vapor wasn't going through the plank — it was accumulating underneath it. A year later the floor was soft in sections and starting to smell. That's a complete tear-out and reinstall."
Every LVP manufacturer — without exception — specifies a minimum 1/4-inch expansion gap at every wall, cabinet toe kick, door frame, and vertical obstruction around the perimeter of the floor. This gap exists because even rigid SPC LVP undergoes slight dimensional change in response to temperature and humidity variation, and a floating floor system that has no room to move will buckle at the perimeter when seasonal conditions expand the planks.
In Northern Virginia's climate — where indoor humidity swings from 30–35% in heated winter months to 55–65% in humid summer months even with AC — the seasonal expansion and contraction cycle is meaningful. Woodbridge homes in river-adjacent communities experience even more pronounced humidity variation, making the expansion gap more critical here than in drier-climate regions where some installers treat it as a formality.
The mistake happens for two reasons: speed (running planks tight to the wall is faster than maintaining a consistent gap) and aesthetics (installers worry the gap will show). Neither is a valid reason to skip it. The gap is completely hidden by the baseboard trim. The consequence of skipping it — perimeter buckling that lifts and pops plank edges within one or two full seasonal cycles — is permanent and requires either re-cutting the floor perimeter or complete removal and reinstallation.
Require your installer to use spacer blocks — typically 1/4-inch plastic or wooden wedges — at every wall throughout the installation. Walk the perimeter yourself before baseboard is installed and verify the gap is consistent and unobstructed at every wall run. Confirm that door frames, cabinet bases, and any other vertical obstruction also have the gap maintained. The baseboard will cover it completely. If an installer tells you the gap isn't necessary or that "SPC doesn't move," ask them to show you that in writing from the product manufacturer's installation guide — because every manufacturer's guide says otherwise.
"I've seen beautiful installations — genuinely good product, good prep — fail at the perimeter in the first summer because the expansion gap was skipped or was half of what it needed to be. The homeowner blames the floor. The floor is fine. The gap that wasn't left is the problem. It's a 10-second step with a spacer block. There's no excuse to skip it."
LVP has an installation envelope that most homeowners never see and most installers don't explain: most manufacturers specify an installation environment of 65–85°F and 35–65% relative humidity. Installing outside these parameters — particularly in high humidity conditions — causes the planks to be seated in an expanded state. When the environment returns to its normal range (typically when fall arrives and heating drops indoor humidity to 30–45%), the planks contract and gaps appear between boards. The floor looks like it has a manufacturer defect. It doesn't. It was installed correctly in the wrong conditions.
Woodbridge's June through August humidity profile — particularly in river-adjacent communities where ambient outdoor humidity runs consistently higher — creates the exact conditions for this mistake. A Woodbridge home opened for a weekend renovation in late July, with outdoor air at 80% relative humidity infiltrating between AC cycles, may have the LVP installed at indoor conditions well above the safe envelope. The crew leaves, the floor looks right. The homeowner closes up the house, the AC normalizes humidity to 50%, and by October there are visible gaps at plank ends throughout the room.
This is the mistake most difficult to diagnose after the fact because it's entirely invisible at installation — the floor truly was seated correctly, the locking joints were engaged, everything looked perfect. The installation conditions are the failure mode, not the installation technique or the product quality.
Before any LVP installation, measure indoor temperature and relative humidity in the room being floored — not the outdoor conditions, the actual indoor conditions at the installation site. In Woodbridge during summer months, this means running the AC system for at least 24–48 hours before installation begins and confirming the room has stabilized within the manufacturer's specified installation range. Floors and Beyond uses a digital thermohygrometer on every installation and does not begin plank placement until conditions are confirmed. If conditions can't be controlled (renovation of a recently vacant home in July, for example), the installation should be scheduled for a time when the AC has been running and the home is at its occupied ambient state.
"We've had homeowners call us about gaps in a floor we didn't install, convinced the product is defective. The first question is always: when was it installed and what were the conditions? 'July, the house had been empty for a week.' That's the answer. The floor is fine. The install happened in an environment that was 10–15 points above where it should have been. There's nothing to fix except waiting for the next humidity cycle and, if the gaps are severe enough, having the floor reflated under correct conditions."
How Do You Know If Your Installer Is Avoiding These Mistakes?
The five questions that separate a thorough LVP installer from one who will leave you with a problem floor six months from now — ask them before the first plank goes down.
| Question to Ask | Right Answer | Warning Answer |
|---|---|---|
| What's the wear layer mil rating on the product you're quoting? | Specific number, 20-mil or above for primary residence | "It's waterproof" or vague quality language without a number |
| How will you check subfloor flatness and what's your tolerance? | Straightedge or laser, 3/16" in 10 feet, self-leveling compound where needed | "We'll walk it and see" or "it looks pretty flat" |
| Is this a floating or glue-down installation and why? | Specific method with reasoning tied to room conditions and subfloor type | "We always float it" without addressing the specific conditions |
| How are you maintaining the expansion gap at walls? | Spacer blocks at every wall, consistent 1/4 inch minimum | "We'll leave a gap" without specifying how it's maintained consistently |
| What are the current temperature and humidity conditions in the room? | Actual measured reading, confirmation it's within manufacturer envelope | "Feels fine" or no measurement at all |
Floors and Beyond answers all five questions before the first plank goes down. Free assessment for Woodbridge and all four Northern Virginia counties.
Book a Free LVP ConsultationFrequently Asked Questions
I already have LVP installed and I'm seeing gaps. Which of these mistakes caused it?
Gaps at plank ends (end-to-end) most commonly indicate either a humidity installation mistake (Mistake 5) or missing expansion gap at walls causing the floor to have nowhere to go when it expands (Mistake 4). Gaps at plank sides (long edges) more often indicate subfloor flatness issues (Mistake 2) where the joint couldn't maintain engagement over a low spot. Floors and Beyond can assess existing gap patterns and identify the root cause — which determines whether the fix is a reflating and re-seating under correct conditions, a subfloor repair, or in severe cases a reinstallation.
My floor feels hollow in certain spots — is that a subfloor issue or something else?
A hollow sound underfoot in a floating LVP installation typically indicates one of two things: a low spot in the subfloor that exceeds flatness tolerance (Mistake 2), or a plank that has lost its locking joint engagement due to any of the above mistake combinations. If the hollow spot coincides with a visible plank seam, the joint has likely separated. If it's in the middle of a plank with no visible seam issue, the subfloor beneath that area is the suspect. Floors and Beyond assesses hollow spots as part of every LVP service call — in most cases the diagnosis is clear within a few minutes.
Can I install LVP myself to avoid these mistakes, or is professional installation necessary?
DIY LVP installation is achievable for straightforward above-grade rooms with straightforward subfloor conditions. The five mistakes in this guide are not exclusively professional mistakes — homeowners doing DIY installation make the same ones, often more consistently because the contractor accountability loop doesn't exist. If you're DIY-installing, the checklist above applies to you directly: measure the mil rating before you buy, check flatness with a rented straightedge, maintain the expansion gap with spacer blocks throughout, choose the right install method for the room conditions, and measure temperature and humidity before you begin. Floors and Beyond offers pre-installation consultations for homeowners planning DIY projects — a one-hour assessment that identifies any site conditions that need addressing before installation begins.
Is 20-mil wear layer overkill for a bedroom?
No. Bedroom LVP takes more traffic than most homeowners expect — children, pets, rolling desk chairs if the room doubles as a home office, and the cumulative impact of foot traffic from the door to the bed and closet every day for years. A 6-mil wear layer in a bedroom with pets or children will show visible thinning in traffic lanes within 3–5 years. 20-mil in a bedroom will outlast the decade without noticeable wear. The cost difference per square foot is modest; the performance difference over a 10-year ownership period is significant. Floors and Beyond specifies 20-mil across every room in a primary residence, not just the high-traffic areas.
// Free LVP Consultation · Woodbridge & Northern Virginia
Get the Installation
Right the First Time.
Floors and Beyond checks all five of these variables before the first plank goes down — on every project, every time. Serving Fairfax, Loudoun, Prince William, and Arlington since 1987.
Book a Free Consultation